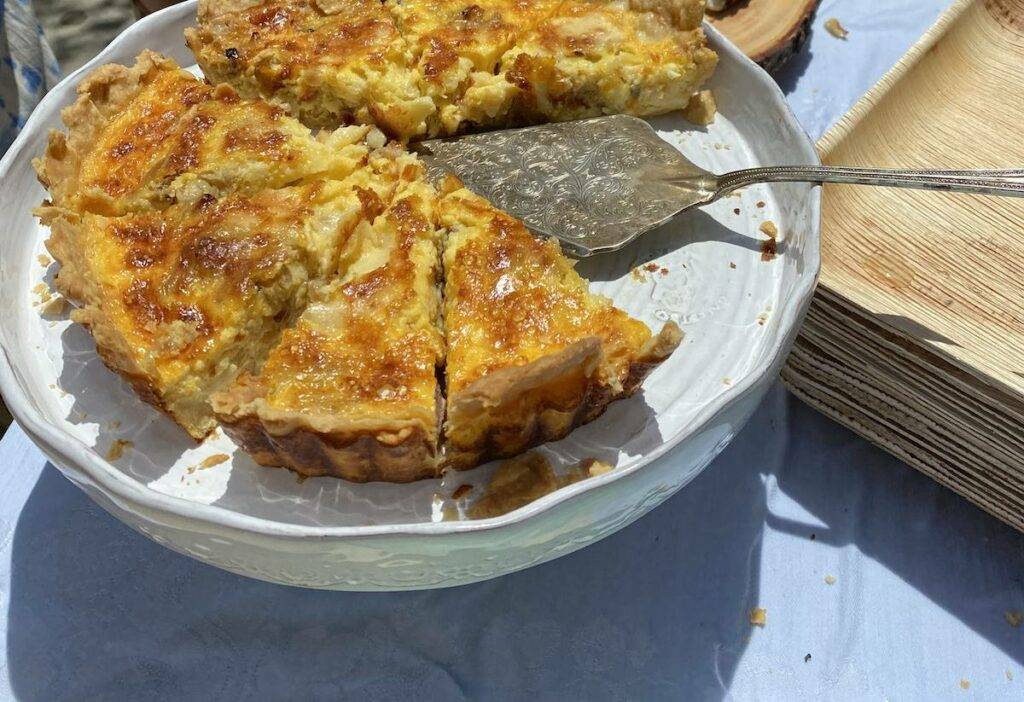
A quiche is the perfect dish for repurposing leftovers and food scraps in a way you’ll actually want to eat.
The quiche is one of the best uses for leftover scraps around the kitchen. It is decidedly simple and elegant. It is as easy as it is impressive. The quiche is delicious hot or cold and can be enjoyed any time of the day. It’s one of those magical dishes that is so much greater than the sum of its parts. The parts consist of nothing more than a simple pie pastry, a savory custard filling, and any combination of cheese, cooked vegetables, and sometimes meat. As an avid maker and enjoyer of the quiche, I want to take you through the step-by-step process of making it with the hope that it will inspire and empower you to incorporate this beautiful thing into your weekly routine.

I spent many years working for the culinary historian, author, and doyenne of French cooking, Anne Willan. The cheese board was a favorite part of our workday lunches and nothing was ever wasted there. When there were enough odds and ends of cheese too small to really eat but too delicious to throw away, we would make what she lovingly referred to as “cheesy bit quiche.” We’d chop or grate all of those final bits and bake them into pie pastry with a lucious and savory custard. The result was an insanely rich and buttery tart birthed out of things for which we might otherwise have no use.
In an effort to be less wasteful and extend those bits hanging around the fridge, I’ve adopted the habit of baking them into a quiche at the end of each week. Those wilting dandelion greens bought at the market with best intentions, the last scraps of prosciutto or bacon from Sunday’s breakfast, and that sad onion going soft on the counter — it can all go into a quiche for one last chance to be enjoyed rather than discarded.
Read more about a local egg farm Nicole visited in Ramona, Cali. at Happy Hens Lay Thousands of Eggs.
Print
RECIPE: Zero-Waste Kitchen Quiche
- Yield: Makes 1 9-inch round quiche. 1x
Description
For more ideas and inspiration on cultivating a zero-waste kitchen, I highly recommend Tamar Adler’s latest, The Everlasting Meal Cookbook. It is a beautifully written, thoughtful and thorough guide to using up every last scrap in the kitchen.
Ingredients
For the pastry:
- 1 cup flour
- 1 pinch salt
- 1 stick (8 tablespoons) cold butter, chunked
- 1 egg yolk
- 3 tablespoons (or more) ice water
For the filling:
- 1 cup cooked bacon or sausage
- 1 onion or 2 shallots, diced and sauteed in bacon fat
- 1 bunch sauteed leafy greens like chard, mustard, or dandelion
- 2 cups chopped or grated cheese such as sharp cheddar or gruyere
- 2 eggs
- 2 egg yolks
- 1 cup milk
- 1/2 cup heavy cream
- Salt and pepper
Instructions
To make the pie crust:
- Stir together the flour and salt in a large bowl or food processor. Cut the cold butter into chunks and add to the bowl along with the egg yolk. If working by hand, use your fingers to pinch the butter and yolk into the dough until the mixture is crumbly and the butter is blended into the flour. If using a food processor, pulse just until coarse crumbs are formed. At this point it will look more like crumbs than a coherent dough.
- Next, work the cold water into the mixture either by barely pulsing it with the food processor or pinching it together with your fingers. The mixture should still be crumbly. Use damp hands to press the mixture into a disc. Wrap in wax paper and then plastic wrap, and chill for two hours or for up to three days. The dough can also be frozen.
- Once the dough is thoroughly chilled, roll it out on a floured work surface and set it in your desired vessel. If you can, press any overhang dough into the top of the pan as the pastry will shrink as it cooks. If you don't, that's okay too. I’ve poured the filling into a very shrunken crust and the results were absolutely delicious, so don’t worry. If the dough breaks or appears thin in any areas of the pan, press extra scraps into that section. It need not be perfect. Prick the bottom of the shell with a fork.
- Set the vessel with the pastry back in the fridge for at least 15 minutes to chill back up. (I’ve also skipped this step and the results were just fine.)
- Preheat the oven to 375°F. Cover the chilled pastry with parchment paper and then pie weights or dried beans. This is to keep it from puffing up too much. I’ve also skipped this step and while I wouldn’t recommend it, the results were just fine.
- Bake the shell, covered for about 20 minutes, uncover and continue baking for 10 more minutes or until just lightly browned. Reduce oven temperature to 350°F.
To make the quiche:
- Gently fill the par-baked pie shell with cooked bacon or sausage (if using), sauteed onions and leafy greens. Sprinkle the cheese on top.
- Whisk eggs, yolks, milk, cream, salt, and pepper for the custard.
- Set your tart pan on a parchment-lined sheet pan. Pour the whisked custard over the filling in the shell.
- Bake until the custard is set and is just starting to turn an appetizing golden brown, from 40 to 75 minutes based on the contents of your quiche and your baking dish.
- Remove the cooked quiche from the oven and leave to rest for at least 10 minutes before serving. It will last up to 3 days in the fridge.
Notes
- Please do not be intimidated by the prospect of making your own pie pastry. It’s basically just butter-infused flour with a bit of extra moisture to hold it all together. If you feel resistant to the thought of making your own, I recommend the store bought Du-Four Puff Pastry in a pinch. It can be quickly rolled out and assembled to create a beautiful quiche. (You will have to blind bake it before adding the filling like in this lovely recipe from Martha Stewart.)
- Making flaky pastry: Working the butter into the flour is most important. This process can be done quickly in a food processor, but I prefer to do it by hand in a large glass bowl. The goal is to combine the flour and butter together while keeping the butter relatively intact and not creating too much gluten (by overworking). The key to optimizing this process is keeping everything cool and working fast.
- Blind baking, or partially baking, firms up the shell enough to contain the filling, keeps the crust from getting soggy and ensures everything cooks evenly. The dough can be rolled out and fit into a vessel of your choosing. I like to use a tart pan with a removable bottom for easy unmolding. I have these in many shapes and sizes; deep, wide and shallow, rectangular, as well as miniature for leftover bits of dough. A standard pie plate or casserole dish would work just as well.
- A quiche can take on nearly any combination of cooked vegetables, cheese, and meat if you so desire. Some favorite fillings include: sauteed onions, cooked bitter greens, spring peas or asparagus, fried potatoes, mushrooms, bell peppers, bacon, sausage, prosciutto. If using a filling that gives off a lot of water like roasted bell peppers or sauteed spinach, just make sure they’re thoroughly drained or wrung out before adding to the mix. I have had problems in the past with too much moisture going into the custard and it not setting properly.
- Don’t worry if some of the custard spills out and over the tart pan or if it bubbles over during cooking as the sheet pan will catch it. This happens to me and the outcome is always a delightfully crispy and rustic edge over parts of the buttery pastry. Never trust a perfect quiche.
- Remember, cooking time will vary based on the size of your vessel and the contents of your quiche. If it looks like the crust is getting too dark around the edges, you can always cover it with a bit of aluminum foil. I find that everything tends to cook evenly and without a problem.


